Web interface
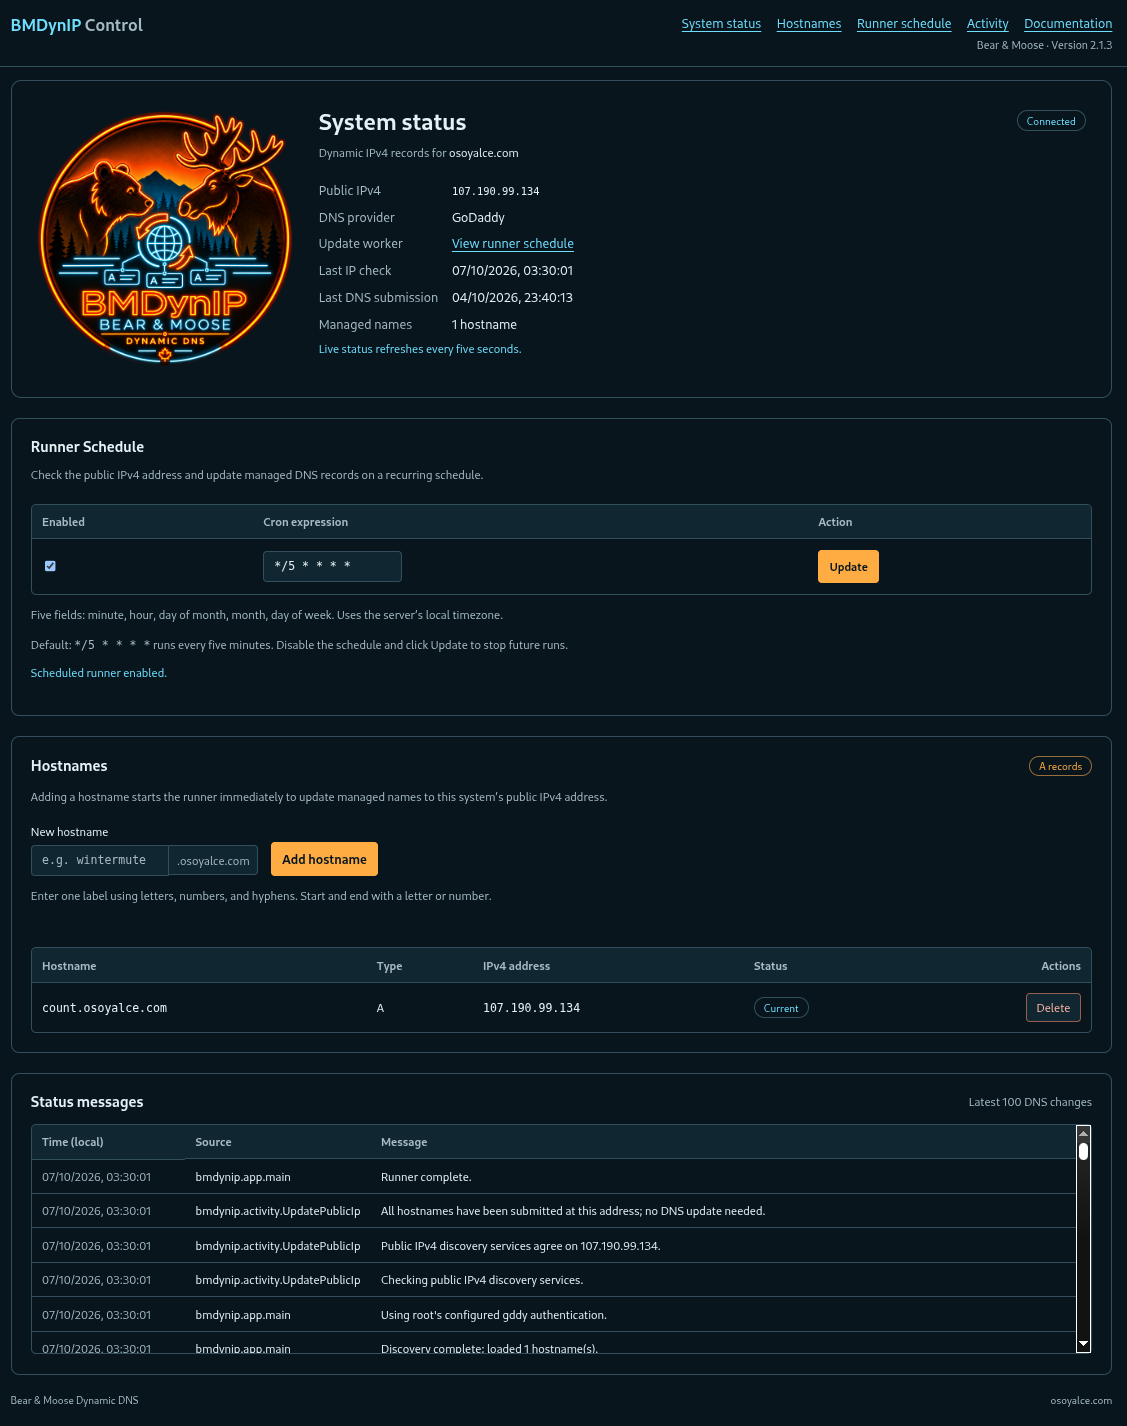
Open the interface
Installation starts bmdynip-web.service on port 49700 and enables it at boot.
Open http://<server-address>:49700/.
The interface has no authentication. Anyone who can reach it can manage hostnames and, when the service runs as root, change the runner schedule.
The interface displays:
- The configured domain and observed public IPv4 address.
- The last check and submission times.
- Managed hostnames and their DNS status.
- The latest 100 DNS change requests.
- Recent process messages, including hostname additions, runner launches, discovery, DNS updates, and completion or failure. Each message identifies its source module.
Status refreshes every five seconds. Times use your browser’s local timezone.
Manage hostnames
Add a hostname
Enter a single label, such as wintermute, and click Add hostname.
Nested names and the apex (@) are not supported.
Saving a hostname stores it in MariaDB and starts the installed runner immediately. The runner dispatches ordered DNS delete/add commands without waiting for them to complete. The submitted address appears on the next refresh.
If the runner cannot start, the hostname remains saved for the next scheduled or manual run, and the interface shows an error.
If a save request times out, check the refreshed hostname list before retrying.
Check DNS status
The server checks each managed hostname through its DNS resolver on page load and every refresh.
| Status | Meaning |
|---|---|
| Current | The hostname’s A addresses match the expected public IP. |
| Mismatch | The hostname’s A addresses differ from the expected public IP. |
| Not found | The lookup returned no A address. |
| Lookup failed | The DNS check could not complete. |
| Resolved | The lookup returned an A address, but the expected public IP is not yet known. |
Hover over a status to see the resolved addresses. DNS caching can delay visible changes.
Delete a hostname
Click Delete and confirm to stop managing the hostname. Its existing GoDaddy A record and change history are retained.
Hostname changes persist across reloads.
Runner schedule
The Runner Schedule panel controls the installed root cron job.
To enable scheduled runs, select Enabled, enter a five-field cron
expression, and click Update. The default expression, */5 * * * *,
runs every five minutes in the server’s local timezone.
To disable scheduled runs, clear Enabled and click Update. Disabling the schedule does not interrupt a run already in progress. Manual runs remain available.
Schedule changes persist across reloads and upgrades. The Web UI service must run as root to save them. The cron updater runs independently of the Web UI service.
Service status and troubleshooting
To restart the Web UI, run this command as root from your BMDynIP checkout:
./scripts/restart.sh
The command waits for the service to become active and pass its /ready
database check, then prints:
BMDynIP Web UI: active on port 49700 (listening on 0.0.0.0)
Installation, upgrades, and restarts wait up to ten seconds for readiness.
GET /ready and HEAD /ready return:
- HTTP
200when live status and DNS history can be read. - HTTP
503when the database or its configuration is unavailable.
If the database is unavailable, the interface displays an error and disables hostname changes until status can be refreshed.
Runner launch failures appear in status messages. Detached gddy commands
write their output to the service log. View the log with:
journalctl -u bmdynip-web.service
To check GoDaddy authentication, follow the root DNS query guide.
Run from a development checkout
With database credentials and the domain configured, use Python 3.10 or newer to start the Web UI:
python3 -m venv .venv
.venv/bin/python -m pip install -r requirements.txt
.venv/bin/python -m bmdynip.server
Open http://127.0.0.1:49700/.
To access the development server from another machine, start it with:
.venv/bin/python -m bmdynip.server --host 0.0.0.0
Stop the development server with Ctrl+C.